Installing and activating, adding sites on your own server or another one, release schedules, templates, videos, and what to do when something doesn't go to plan.
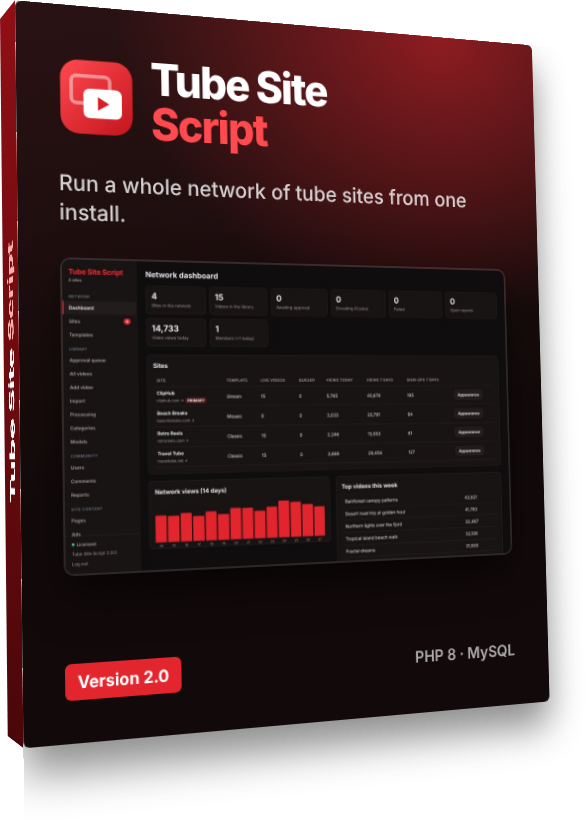
Tube Site Script runs a network of tube sites from one installation and one admin area. You install it once, on your main domain, and then add as many other domains as you like. Each one is its own tube site with its own template, settings, ads, pages and release schedule, and they all share one video library, one encoder and one set of member accounts.
One library. Upload or import a video once. Each site decides which videos it shows.
Any domain. Domains on the same server are pointed at the install. Domains on other servers run a small connector.
Different on every site. Templates, colours, per-site titles, spintax and drip schedules stop your sites looking like copies of each other.
One key. Your Installation Key activates the primary domain; every other site runs from it.
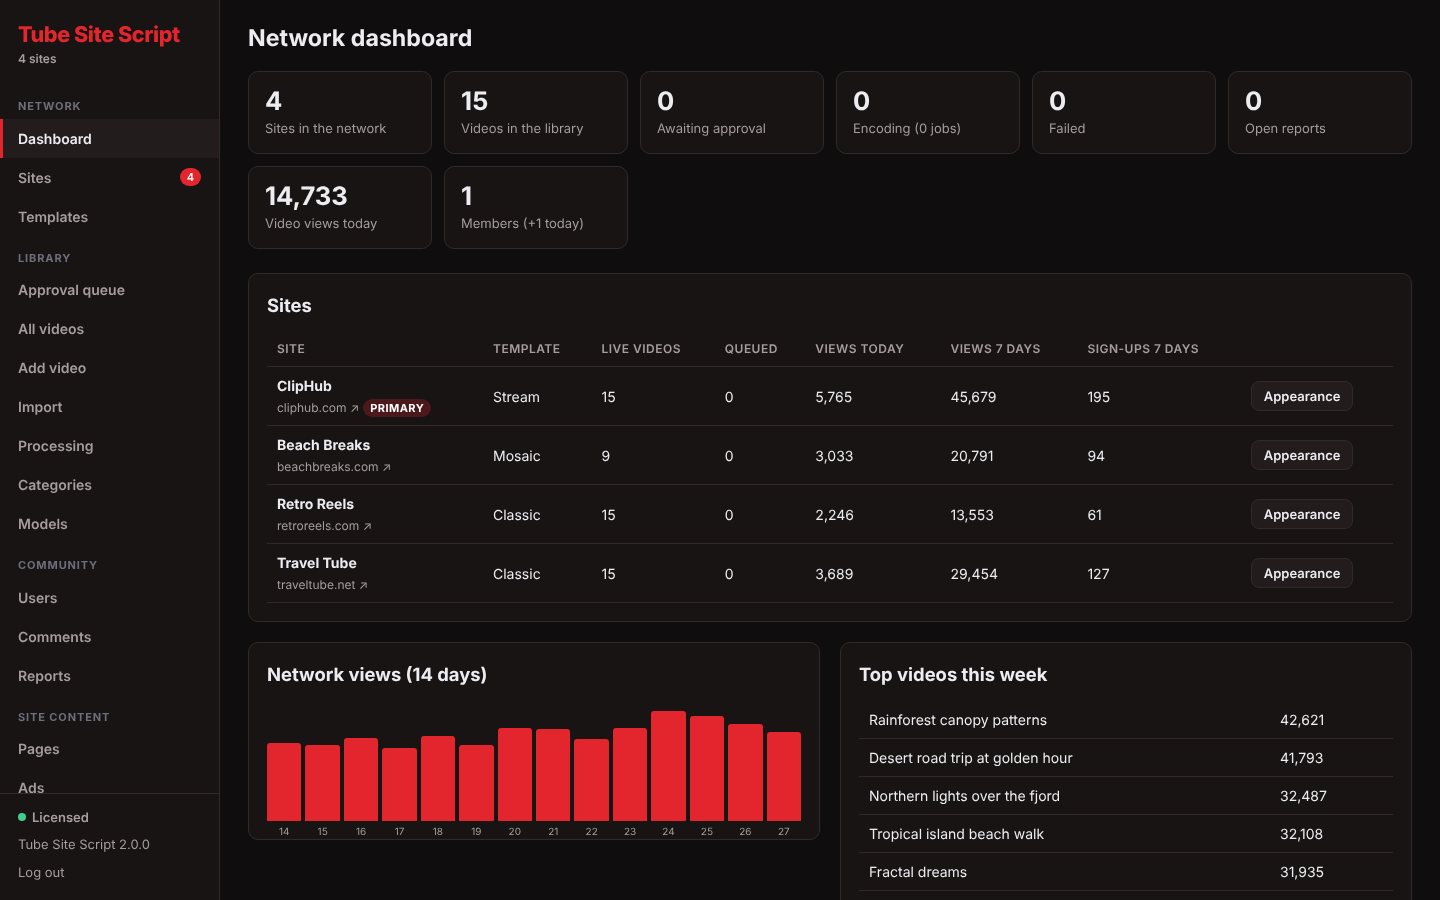
The admin is at https://your-main-domain/admin and only on your primary domain. The Network dashboard shows every site with its template, live and queued videos, views and sign-ups, plus network views and the week's top videos.
The network dashboard. Click any screenshot to see it bigger.
The menu on the left is grouped into Network (Dashboard, Sites, Templates), Library (Approval queue, All videos, Add video, Import, Processing, Categories, Models), Community (Users, Comments, Reports), Site content (Pages, Ads) and settings. The licence status is shown at the bottom.
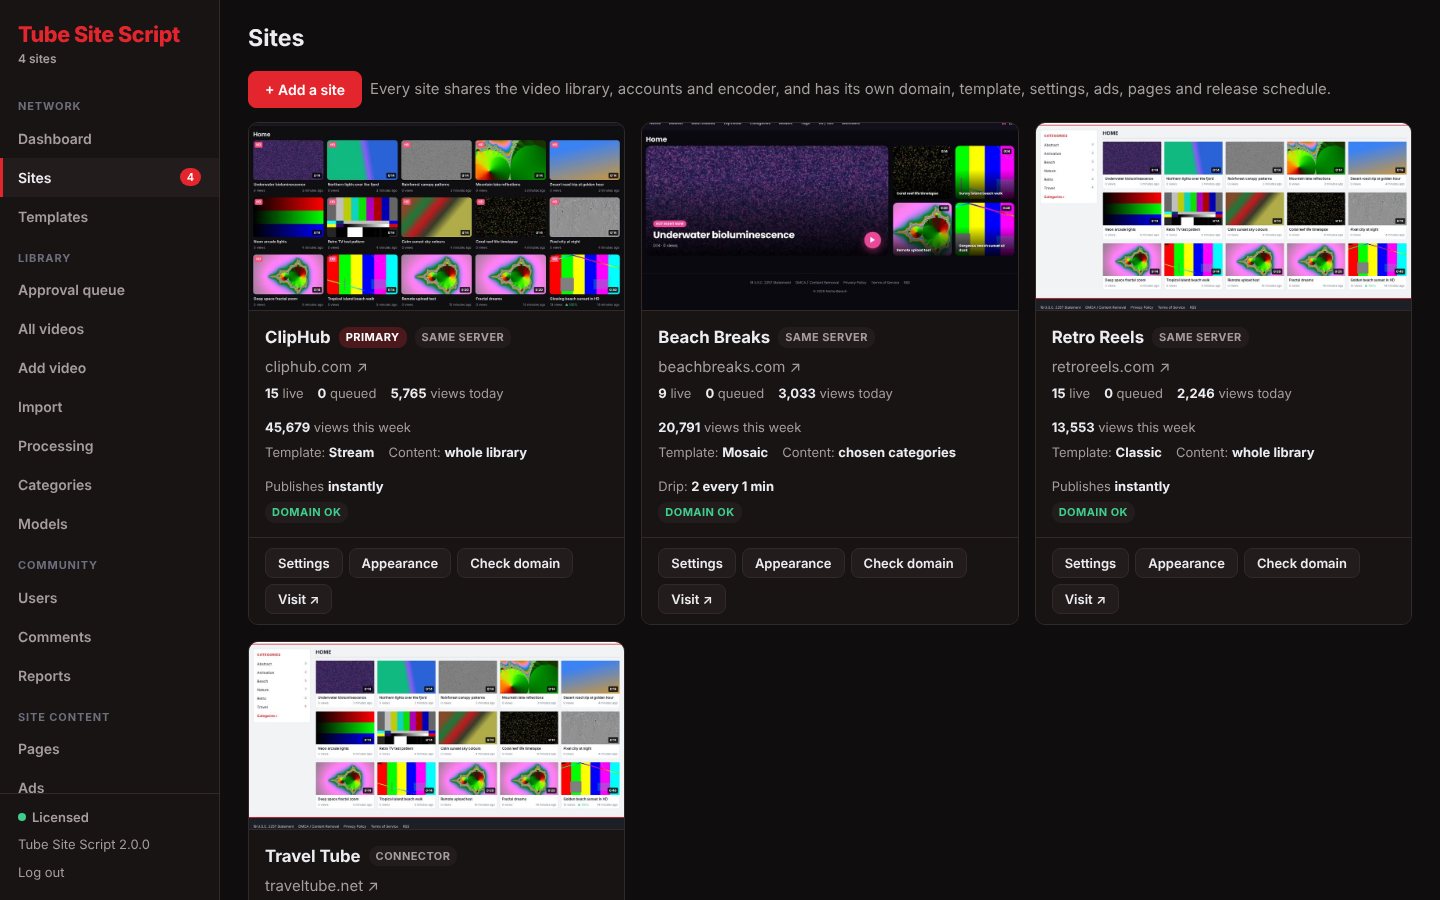
Admin › Sites shows a card for every site: its template, whether it's on this server or uses the connector, live and queued videos, views, its content rule, its schedule and whether its domain check passed.
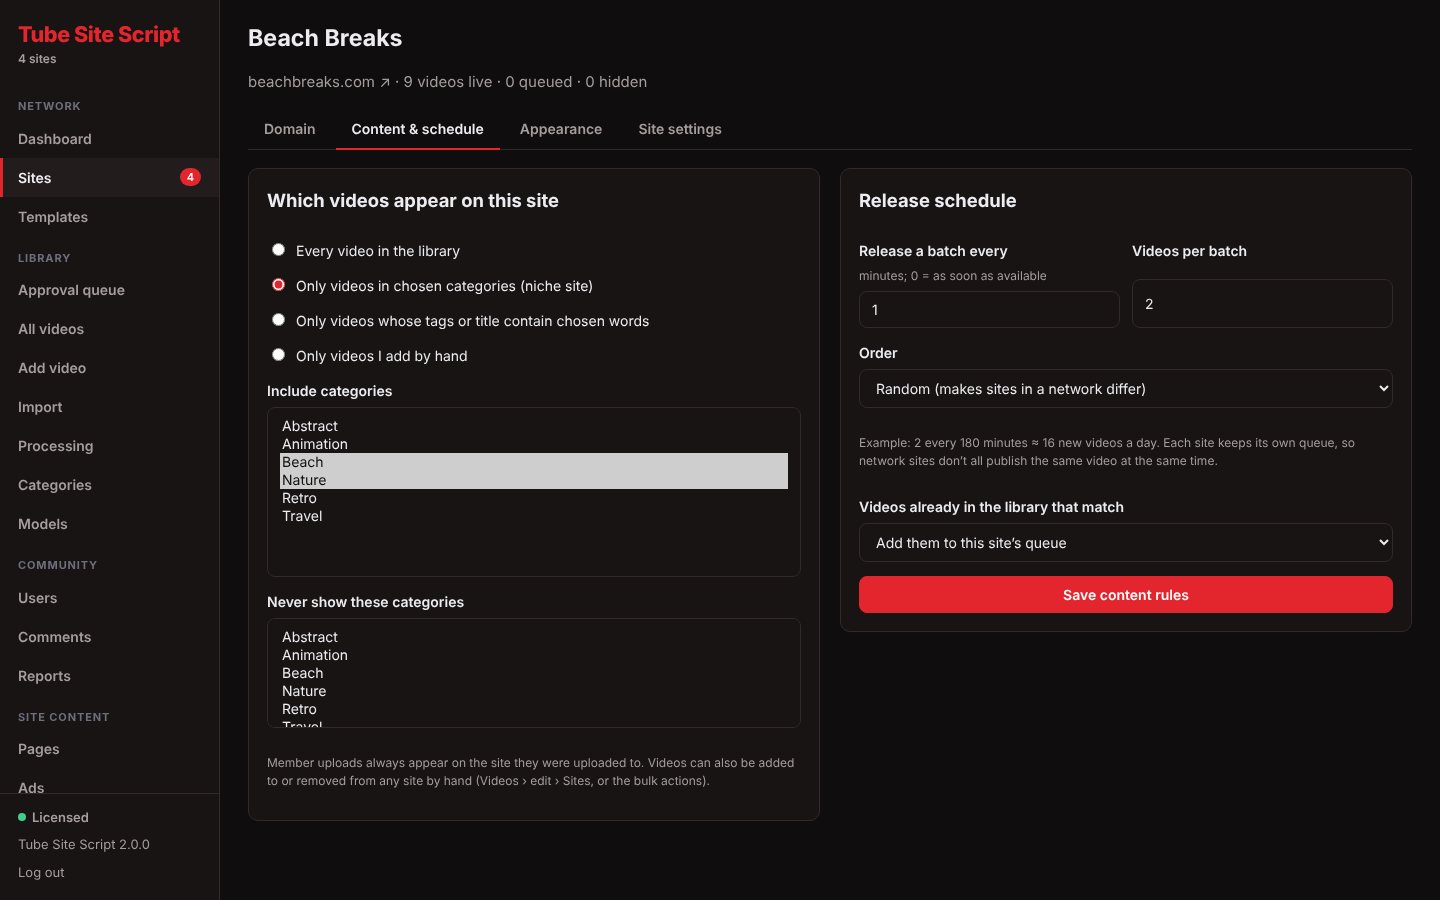
Open a site to change it. Its settings are on five tabs: Domain, Content & schedule, Appearance, Site settings and, for remote sites, Connector. Anything you don't set on a site uses the network default from Settings.
Point the domain's DNS at this server (an A record to the server's IP address, shown on the Sites page).
Make the web server answer for it with the same folder: in cPanel add it as an Alias (parked) domain of the main domain; on nginx add it to server_name; on Apache add a ServerAlias.
Click + Add a site, enter the name and domain, choose This server, pick a template, and decide what happens to videos already in the library: put them all on the new site now, or add them to its release queue.
Save, then click Check domain. A green Domain OK means the domain reaches this install.
Set up SSL for each domain in your hosting panel (for example with Let's Encrypt), and choose https:// for the site. www. is handled automatically, and you can add extra domains that show the same site under Other domains for this site.
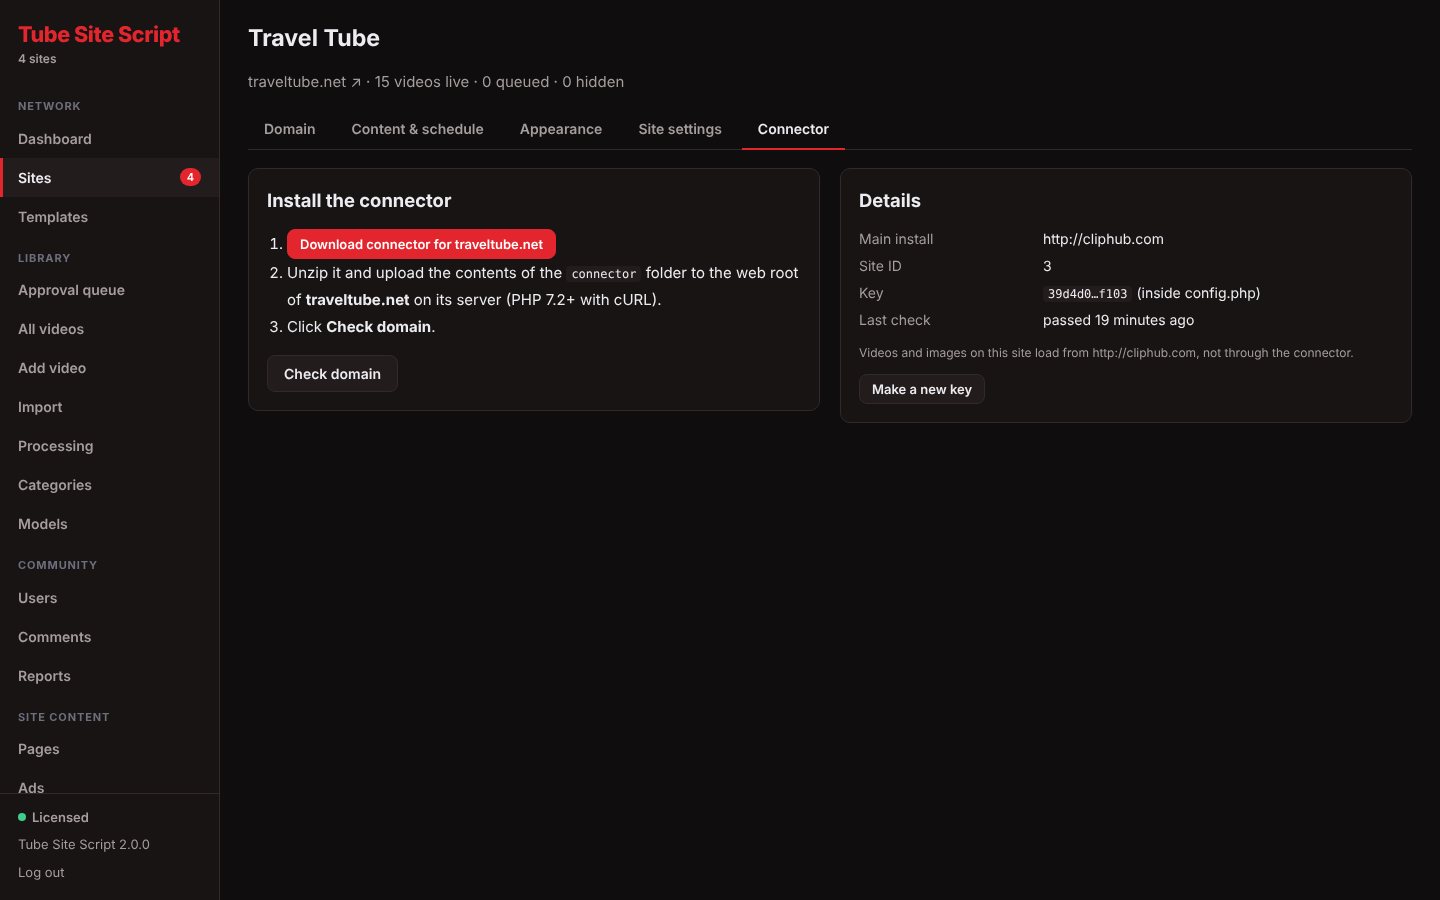
For a domain hosted somewhere else, choose Connector when you add the site. Then open the site's Connector tab and download the connector made for it.
Upload the connector's files to the document root of that domain on the other server (it needs PHP 7.2 or later with cURL).
Click Check domain on the main install.
The connector passes visitors' requests to your main install and returns the pages. Every request is signed and checked (HMAC-SHA256 with a five-minute window and a replay guard), pages for visitors who aren't logged in are cached on the connector for a short time, and videos and images load straight from your main server or your CDN.
If a video upload through a connector site fails with "too large", raise upload_max_filesize and post_max_size on the connector's server too.
Each site can release videos as soon as they're ready, or on a drip schedule:
Release a batch every - minutes between batches (0 = as soon as available).
Videos per batch - how many go live each time.
Order - oldest first, newest first, or random. Random makes sites in the same network differ.
Queued videos wait in the site's queue until their turn; the cron job releases them. A video can also have a publish date of its own, in which case no site shows it before then.
Library › Add video takes an upload from your computer, a video URL to download, a hotlinked MP4 that plays from another host, or an embed code. Add a title, description, categories, tags and models, and choose whether it publishes straight away.
Uploaded and downloaded videos are encoded by the worker into the qualities set in Settings, with 10 thumbnails, a hover preview clip, timeline thumbnails and your watermark if you've set one. Progress shows under Processing.
Members can upload too, if you allow it: they confirm age, consent and rights, and their videos go to the approval queue.
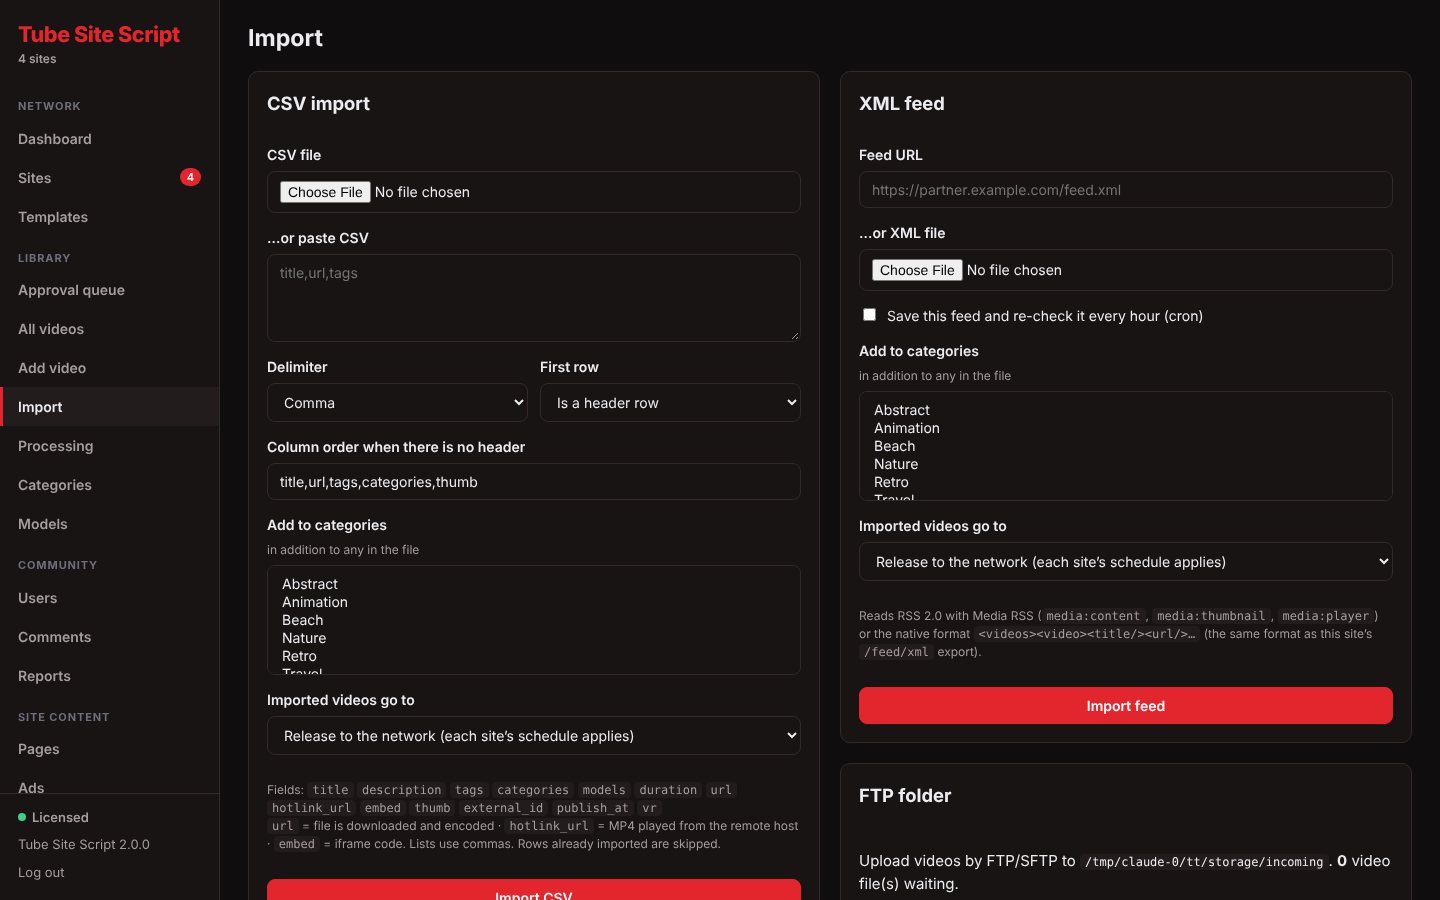
Library › Import brings in many videos at once from a CSV file, an XML or RSS feed (including Media RSS) or the FTP drop folder.
Columns (CSV) or elements (XML): title (required), description, tags, categories, models, duration, url (downloaded and encoded), hotlink_url, embed, thumb, external_id, publish_at and vr. Lists are comma separated; duration can be seconds, mm:ss or PT12M5S.
Files dropped into the FTP folder (storage/incoming by default) are picked up by the cron job.
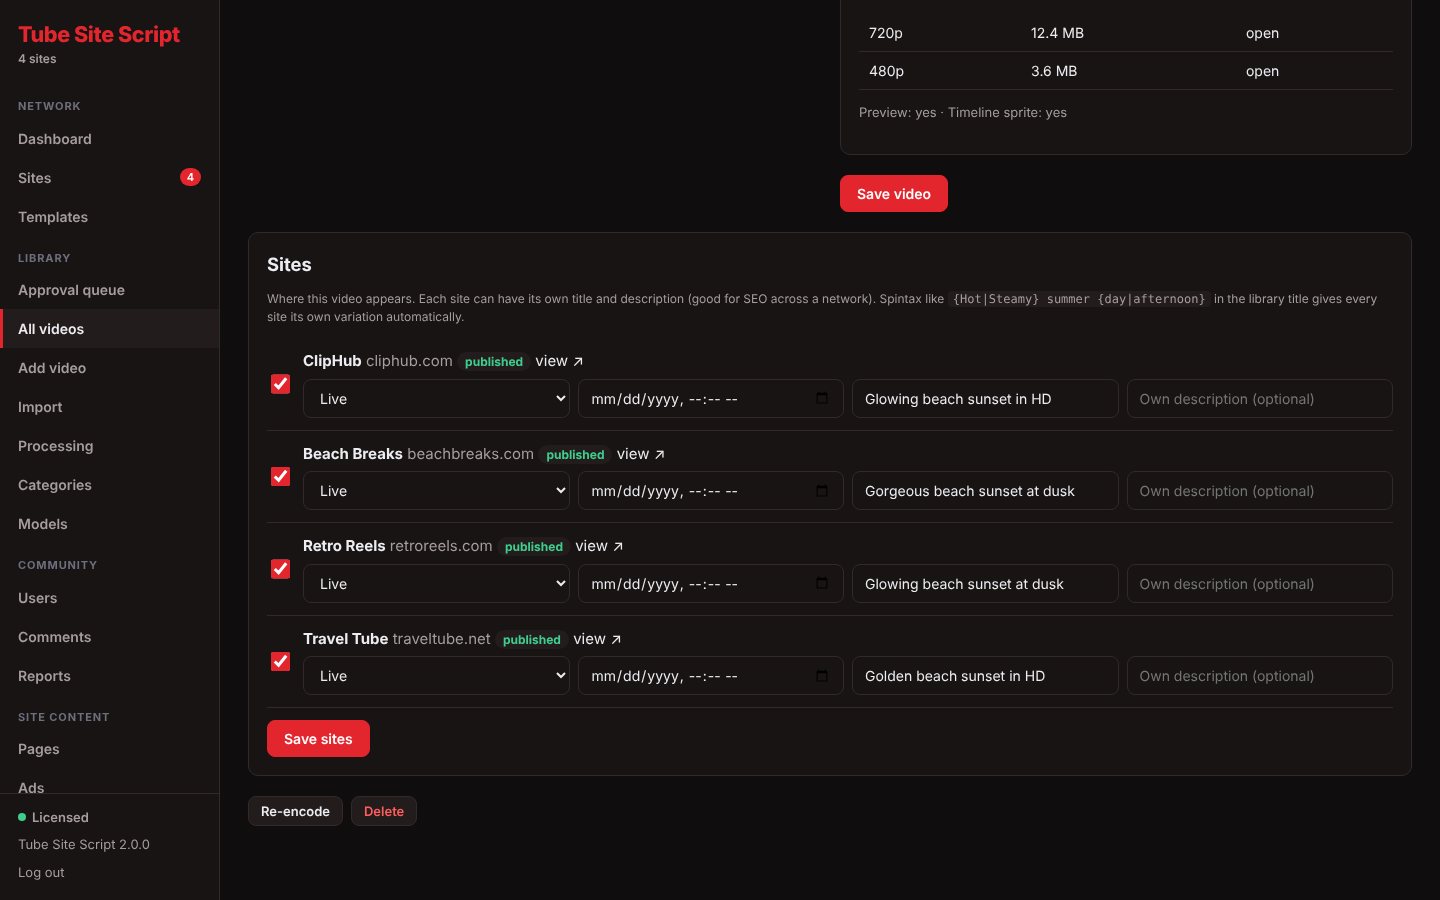
Videos reach sites through each site's content rules. To change it for one video, open the video and use its Sites panel: tick or untick each site, and for each one choose Live, In release queue or Hidden, with an optional release time of its own.
In All videos you can select many videos and use the bulk actions to add them to a site, queue them for a site or remove them from one.
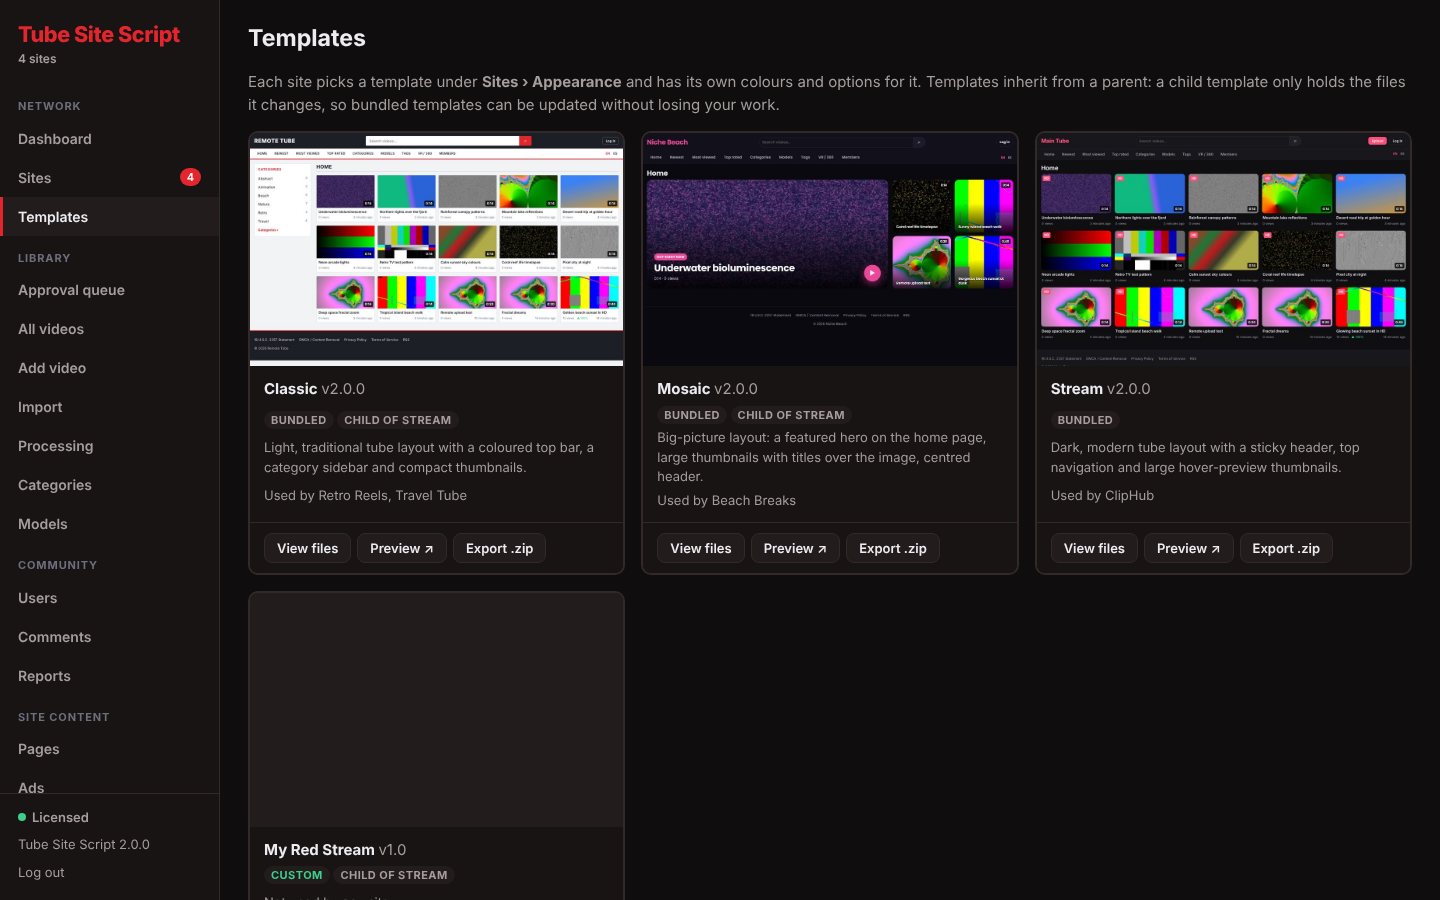
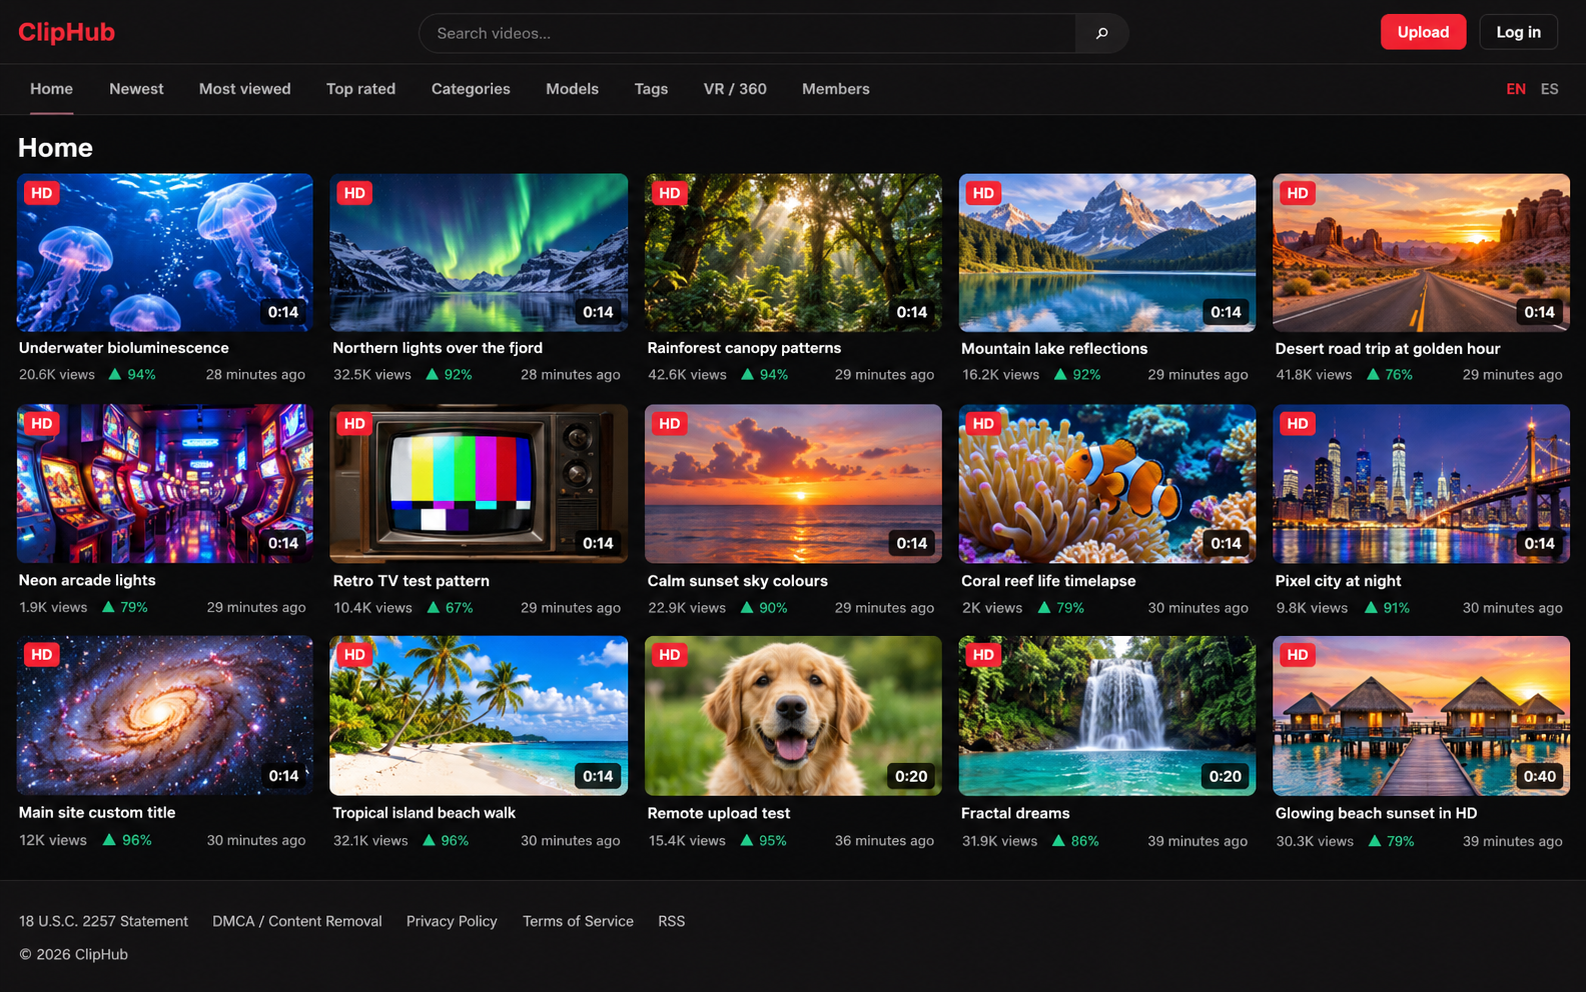
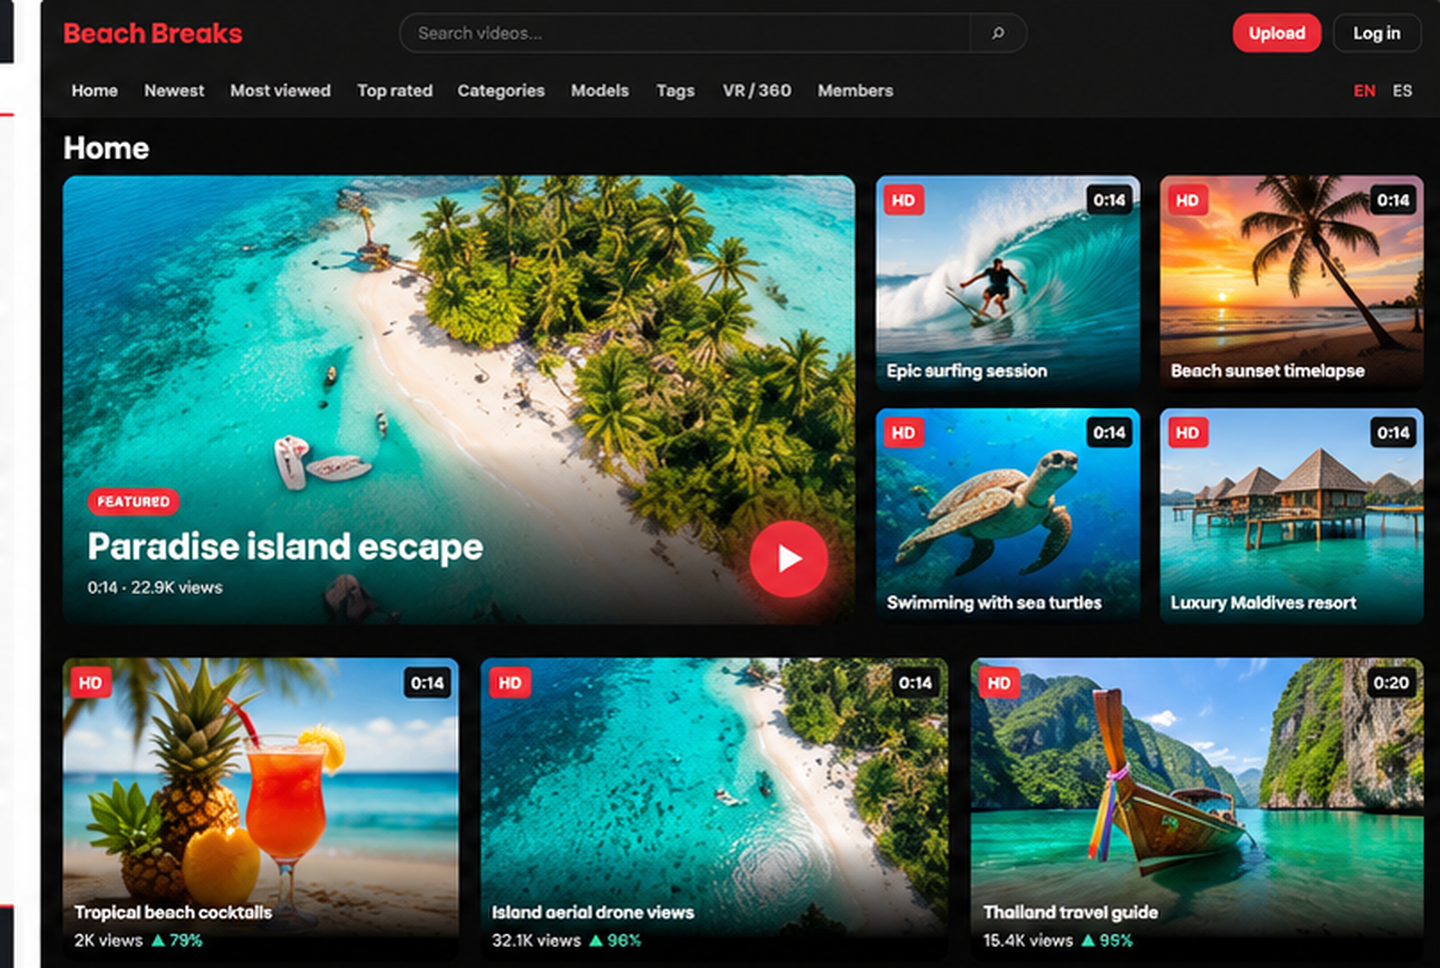
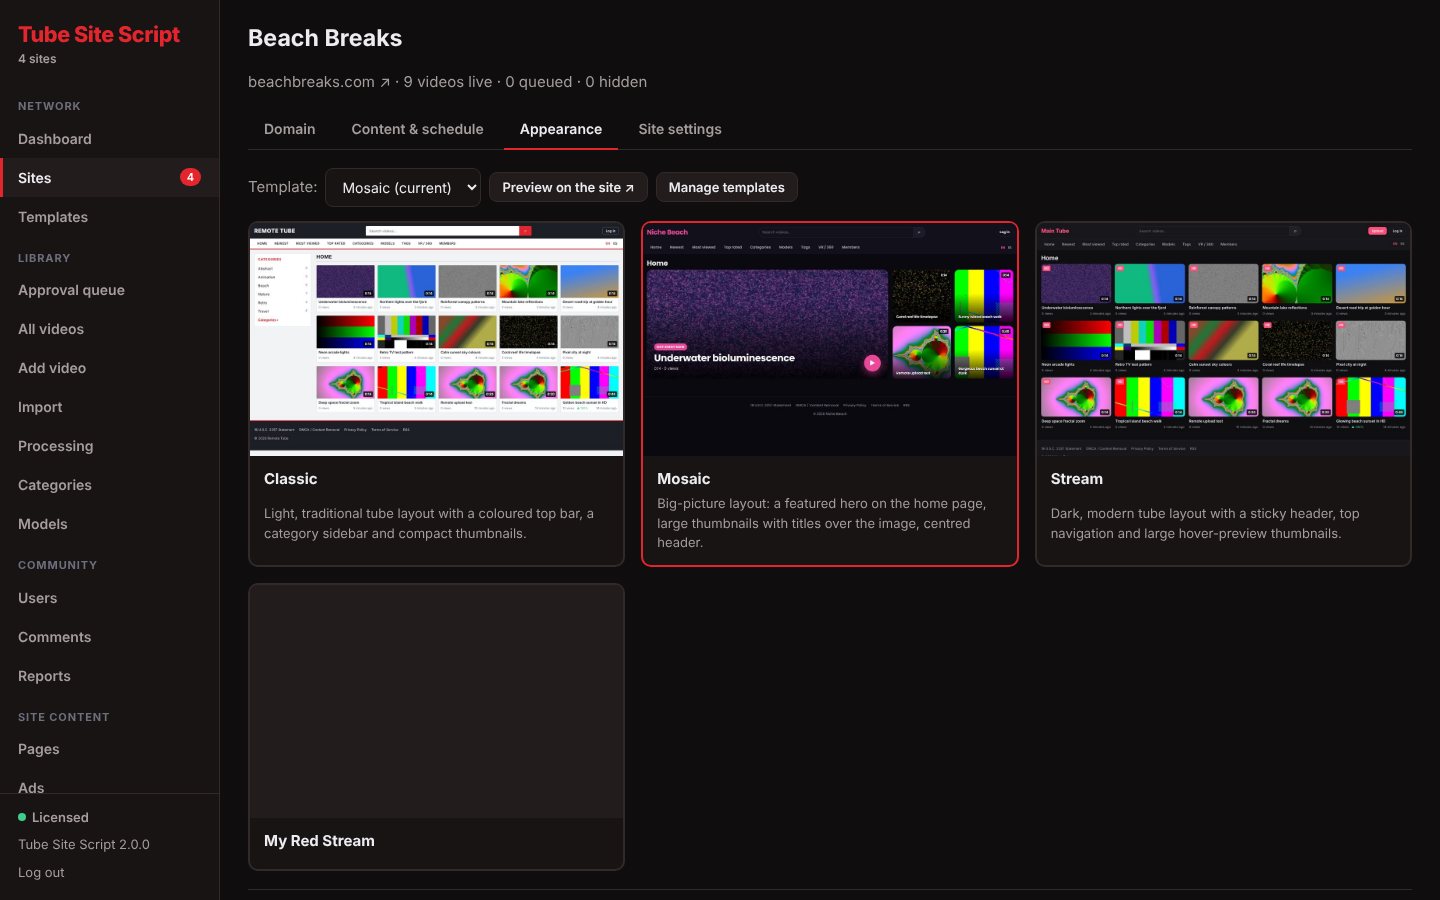
Three templates are included: Stream (dark and modern), Classic (light, with a category sidebar) and Mosaic (a large hero video and overlay thumbnails). Admin › Templates lists them with any you add.
StreamMosaic
Use Preview to see any template on any site through a private link before you switch. Bundled templates are read-only, so updates never overwrite your work.
A site's Appearance tab shows the options of the template it uses - colours, font, thumbnail size and corners, what shows on thumbnails, layout switches and text - plus a logo, favicon, extra CSS and HTML for the head and the end of the page. Every site keeps its own values.
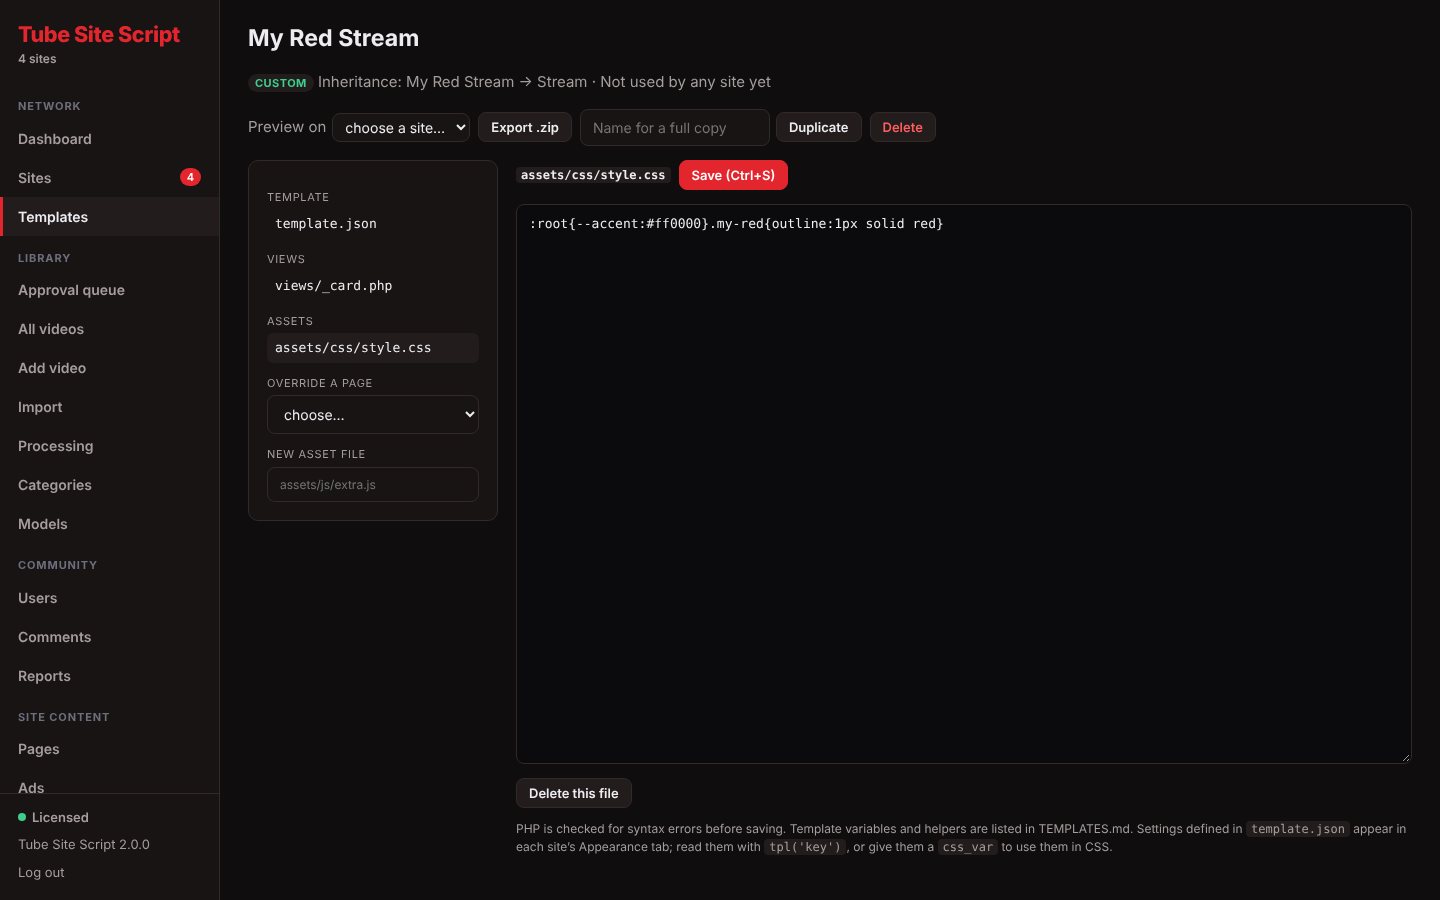
Click Create a template, choose a template to base it on, and give it a name. Your new template inherits every page and file from its parent; you only add what you want to change.
Open any page (view) to override it - the editor starts with the inherited version.
PHP is syntax-checked before saving, so a typo can't take a site down.
Add CSS, JavaScript and images to the template's assets folder.
Duplicate, Export .zip and Install from .zip let you copy and share templates.
The full reference for building templates is in TEMPLATES.md in the download. The browser editor can be switched off under Network settings › Templates, or with 'template_editor' => false in config.php.
Templates contain PHP. Only install templates from people you trust.
Pages holds pages such as Terms, Privacy, DMCA and 2257 (starting points are included - have them checked for your business). Ads holds ad zones: header banner, video page sidebar, below the player, inside video grids, footer, in-player pre-roll and the pause overlay. Each page or ad can be for every site or for one site; a site-specific one replaces the network one on that site.
Your Installation Key is in your purchase email and on your order page. One key activates one installation, on its primary domain. Every other site you add runs from that installation and needs no key of its own.
Keys look like XXXX-XXXX-XXXX-XXXX. Paste it from your email to avoid typing mistakes. The admin only ever shows part of the key, and it is stored encrypted.
Development addresses - localhost, private IP addresses, and names ending in .test, .local or .localhost - run in full without activating, so you can build and test first.
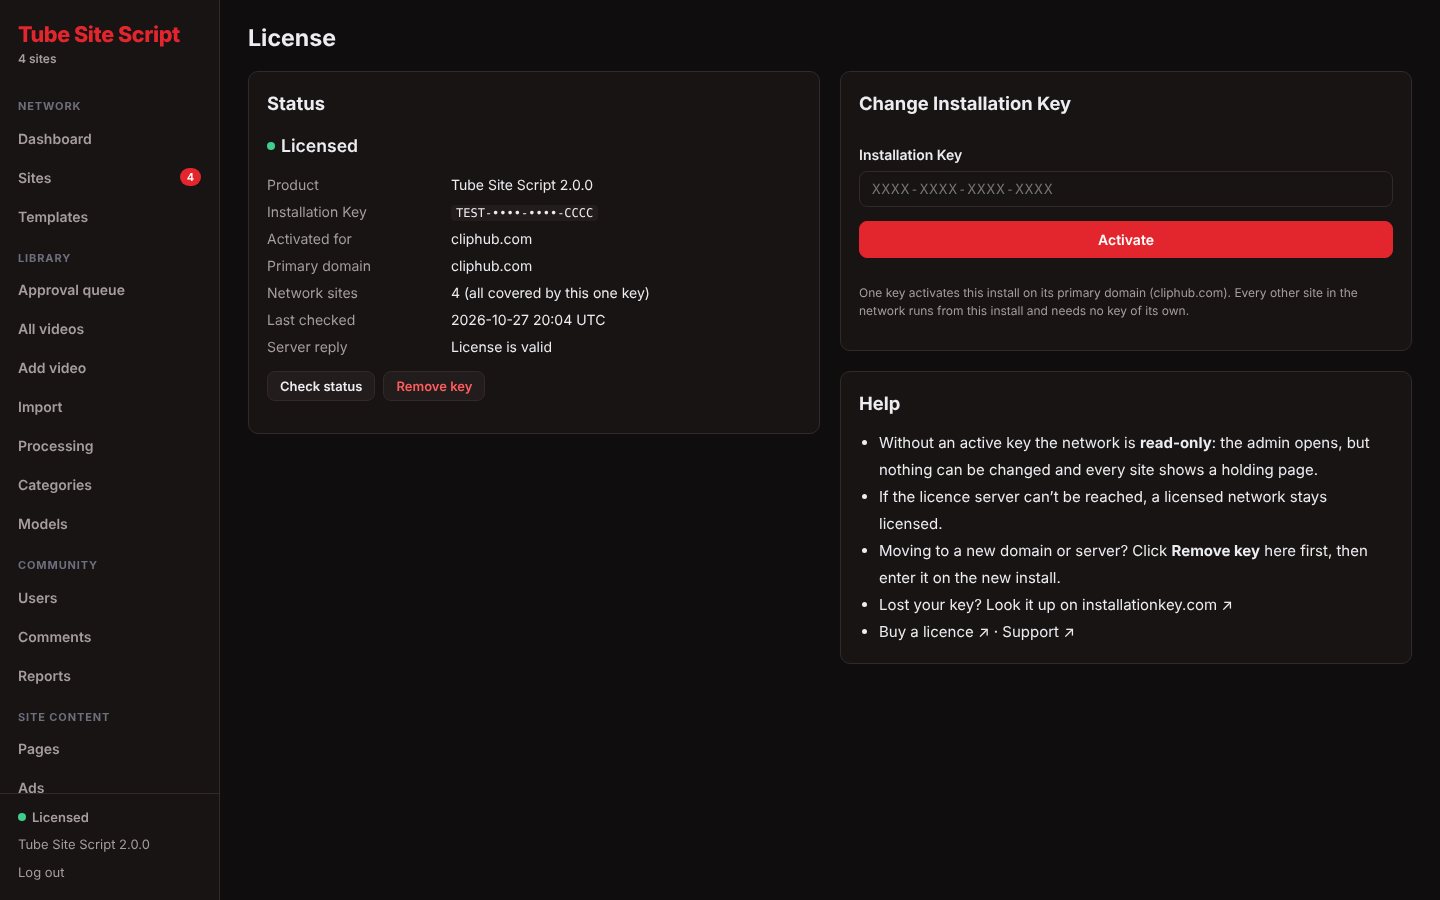
Enter your key at the Installation Key step of the installer. If you skipped it, go to Admin › License, paste your key and click Activate. The server must be able to reach installationkey.com over HTTPS.
The license is checked again every 24 hours by the cron job. If the license server can't be reached, an active license stays active. Check status checks it immediately.
New server: on the old install, click Remove key in Admin › License to release the activation (this makes the old install read-only). Then enter the key on the new install.
New primary domain: make another site the primary site; the License page then shows Move licence to this domain.
Old server gone? Try activating on the new one. If the key is still in use, contact support to have the activation reset.
Updates are free. Download the new version from your order page and upload the files over the old ones, but keep config.php, the storage/ folder, public/media/ and any templates you made yourself. Then run php cli/tube.php template:publish to refresh template assets.
Install ffmpeg (with ffprobe and libx264) and set the paths to both in config.php ('ffmpeg' and 'ffprobe'). Run which ffmpeg on the server to find the path.
Videos stay in Processing
The worker isn't running. Check the two cron lines are in place and use the right path to PHP, or run php cli/tube.php worker --once to see any error. Also check the license is active - the worker pauses while it isn't.
Big uploads fail
Raise upload_max_filesize, post_max_size, max_execution_time and max_input_time in PHP, and client_max_body_size on nginx. For connector sites, raise them on that server too.
Pages show 404 except the home page
URL rewriting isn't working. On Apache enable mod_rewrite and allow .htaccess in public/; on nginx use the example config in install/.
Sites and domains
"Domain check failed"
Check the domain's DNS points at the right server and that the web server answers for it with the install's public/ folder (alias domain, server_name or ServerAlias). DNS changes can take a while to spread. Hover over the red label to see the reason.
A connector site shows "bad signature" or won't load
Download the connector again from the site's Connector tab and upload it - it carries that site's secret. Check the other server's clock is correct (requests are only valid for five minutes) and that it has cURL.
A new site has no videos
Check its content rules and its schedule. If you chose to queue existing videos, they appear in batches as the drip schedule runs. Use php cli/tube.php publish to run the queue now.
The admin redirects to another domain
The admin only runs on the primary domain, so it always sends you there.
License
My key isn't accepted
Read the message shown with the key. Copy and paste the key from your purchase email. If it says the key is in use elsewhere, remove it on the other install first, or contact support. Make sure your server can make outgoing HTTPS requests to installationkey.com.
All my sites show a "being set up" page
The license isn't active, so the network is read-only. Open Admin › License to see why and activate your key.
Use the support form at easiersoftware.com/support. To help us answer quickly, include the email address you bought with, your Tube Site Script version (shown at the bottom of the admin menu), your PHP and database versions, what you were doing and the exact message you saw.
Never post your full Installation Key in public. Support may ask for it privately to look up your license.